This guide covers the essential maintenance procedures, common troubleshooting steps, and replacement cycles for the Deburring Machine to ensure optimal performance and longevity.Maintenance Tips for Your Automatic Deburring Machine.
Deburring machine maintenance requires daily cleaning of dust/shavings, weekly lubrication of moving parts, and regular inspection of belts, brushes, and abrasive media. Troubleshooting involves checking for worn brushes, incorrect belt alignment, or motor issues if performance drops. Key safety includes wearing PPE (masks, gloves) and ensuring proper ventilation.
1. Daily Maintenance Checklist
Performing these checks daily helps prevent unexpected downtime and ensures consistent grinding quality.
-
Dust Cleaning: Clean dust accumulation inside the equipment and beneath the conveying worktable.
-
Cantilever Lock: Verify that the cantilever locking wrench is securely tightened and not loose.
-
Conveyor Belt Inspection: Ensure no foreign parts or debris are on the conveyor belt.
-
Safety Door Check: Confirm that the main host side door is properly closed.
-
Electrical Panel Doors: Ensure all electrical box doors are securely shut.
-
Air Pressure: Verify the compressed air pressure is maintained between 0.4 and 0.6 MPa.
-
Dust Collector (If equipped): Empty the dust and clean the internal water tank of the dust collector.
2. Monthly Maintenance Procedures
These monthly tasks focus on lubrication and inspection of key mechanical and electrical components.
-
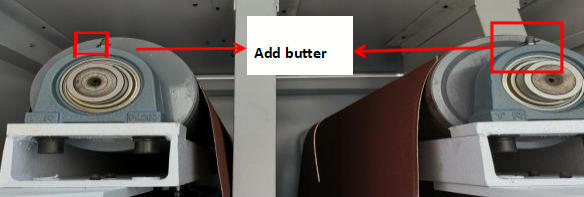
Sand Belt Support Roller Bearings: Lubricate the bearings with 50ml of oil.
-
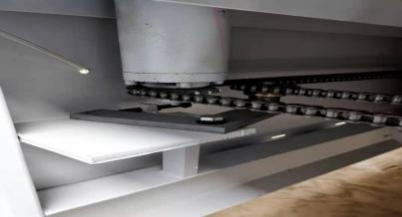
Platform Lifting Chain: Apply lubricating oil to the chain and inspect it for excessive slack or looseness.
-
Lifting Shafts: Clean the lifting shafts located under the platform and apply a coat of lubricating oil.
-
Electrical Cabinet Cleaning:
-
Turn off the main power supply.
-
Open the electrical box and wipe away dust using a dry cloth.
-
Caution: Do not use an air gun, as it can force dust into sensitive components.
-
Inspect wiring for any loose connections.
3. Troubleshooting Common Issues
Diagnose and resolve frequent operational problems with these step-by-step guides.
3.1. Abrasive Belt Tracking Deviation
3.2. Conveyor Belt Tracking Deviation
-
Correction Procedure:
-
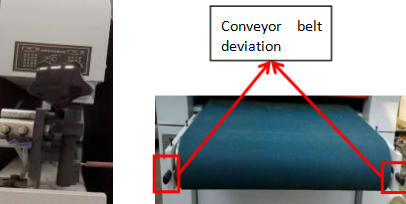
On the side where the belt is drifting, rotate the adjusting screw one full turn clockwise.
-
On the opposite side, rotate the adjusting screw half a turn counter-clockwise.
3.3. Sand Belt Motor Not Running
3.4. Pre-Operation Safety Check
4. Consumable Parts Replacement Cycle
The table below provides general guidelines for replacing key wear parts. Actual service life may vary based on usage intensity and materials processed.