How to Make a Professional Knife Using a Belt Grinding Machine: Beginner’s Guide
Jul 17 ,2025
Introduction to Knife Making: Forge your path into bladesmithing with this comprehensive guide. Using a belt grinding machine simplifies the knife-making process while delivering professional results, even for beginners.
Essential Metalworking Tools
To craft quality knives, you’ll need these fundamental tools:
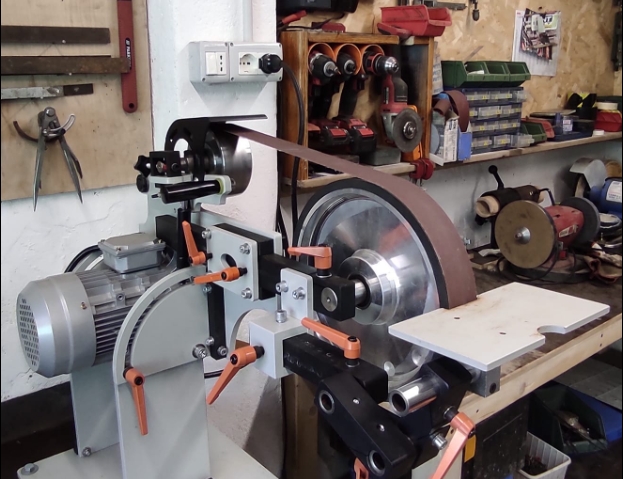
- Belt grinding machine (primary shaping tool)
- Angle grinder with cutting discs
- Drill press for pin holes
- Calipers and measuring tools
- Files and sandpaper (80-2000 grit)
- Safety equipment (goggles, respirator, gloves)
Tool Steel Selection
Choosing the right steel is critical for knife performance:
Common Knife Steel Types
| Steel Type | Best For | Difficulty Level |
|---|---|---|
| 1095 Carbon Steel | Beginner-friendly, excellent edge | Easy |
| O1 Tool Steel | Balance of toughness and edge retention | Intermediate |
| A2 Steel | Wear resistance, professional knives | Advanced |
| Stainless (440C) | Corrosion resistance, kitchen knives | Intermediate |
Selection Factors
- Intended use (EDC, kitchen, hunting)
- Edge retention requirements
- Corrosion resistance needs
- Heat treatment accessibility
- Workability with belt grinder
Knife Making Techniques
Shaping the Blade
Step-by-step belt grinding process:
- Transfer knife template to steel stock
- Rough-cut profile with angle grinder
- Establish bevel angle (typically 20-25°) using belt grinder
- Progress through grits (start 80 grit, finish 400 grit)
- Maintain consistent pressure and cooling to prevent overheating
Heat Treating Knives
Critical steps for durable blades:
- Normalize: Heat to critical temp (1500°F/815°C), air cool
- Harden: Reheat to critical temp, quench in appropriate medium (oil, water, air)
- Temper: Reheat to 350-450°F (175-230°C) to reduce brittleness
- Verify hardness with file test (should skate off surface)
Knife Handle Materials
Material Types Comparison
| Material | Pros | Cons |
|---|---|---|
| Hardwoods (Walnut, Maple) | Classic look, comfortable grip | Requires sealing, can crack |
| Stabilized Wood | Enhanced durability, unique patterns | Higher cost |
| G10/Micarta | Weatherproof, extremely durable | Synthetic appearance |
| Bone/Antler | Traditional aesthetic | Requires special handling |
Choosing the Right Handle
- Consider hand size and grip comfort
- Match material to knife purpose (e.g., synthetic for wet environments)
- Ensure proper thickness (typically 0.75-1 inch)
- Account for balance point when attached
Final Assembly and Finishing
Attaching the Handle
- Drill pin holes through tang and handle material
- Epoxy handle scales to tang
- Insert pins or corbys and peen/secure
- Shape handle with belt grinder using 120-220 grit belts
- Sand progressively to 600+ grit
Polishing the Knife
Achieve professional finishes:
- Hand sand blade from 400 to 2000 grit
- Use belt grinder with fine-grit belts (800+ grit) for satin finish
- Apply polishing compounds on buffing wheels for mirror finish
- Protect blade with food-safe oil or wax
Knife Making Safety Essentials
- Always wear ANSI-approved safety glasses
- Use respirator when grinding/sanding
- Maintain secure workpiece grip (never use gloves near rotating equipment)
- Ensure proper ventilation for heat treatment
- Keep fingers clear of belt path on grinder
Beginner Tips for Success
- Start with simple designs (drop point or straight back)
- Practice grinding techniques on scrap metal first
- Monitor steel temperature (avoid blueing during grinding)
- Be patient with hand sanding – it makes the difference
- Document each step for process improvement
With practice, your belt grinder knife making skills will develop rapidly. Remember that every master bladesmith started with their first blade. Your journey into knife making begins now!


